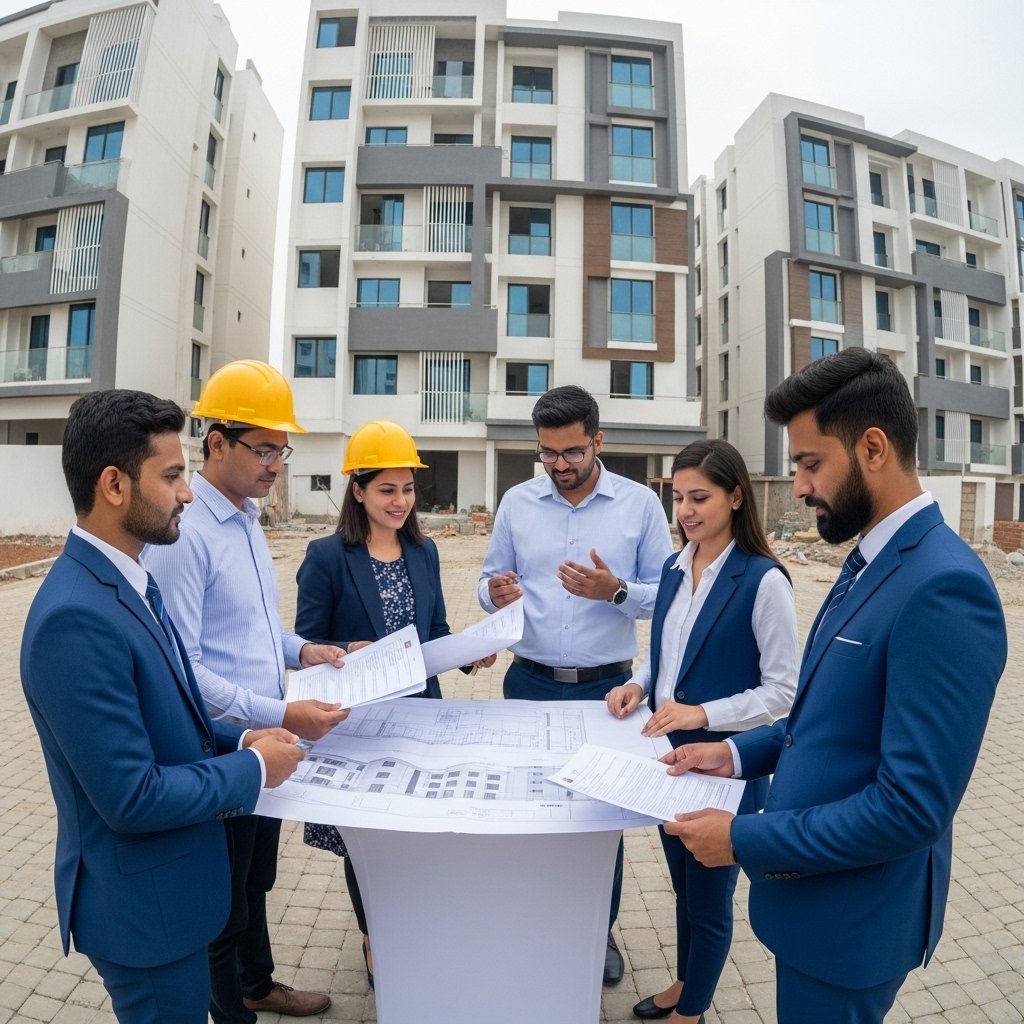
Introduction
Finishes represent the final phase of construction that transforms a bare structure into a functional, aesthetically pleasing space. This blog post explores three critical finish elements, Soft Finishes In Construction —plastering, flooring, and painting—that significantly impact both the appearance and durability of a building. Whether you’re an engineering professional, a developer, or someone planning to build your dream home, understanding these processes will help you make informed decisions and ensure quality outcomes in your construction projects.
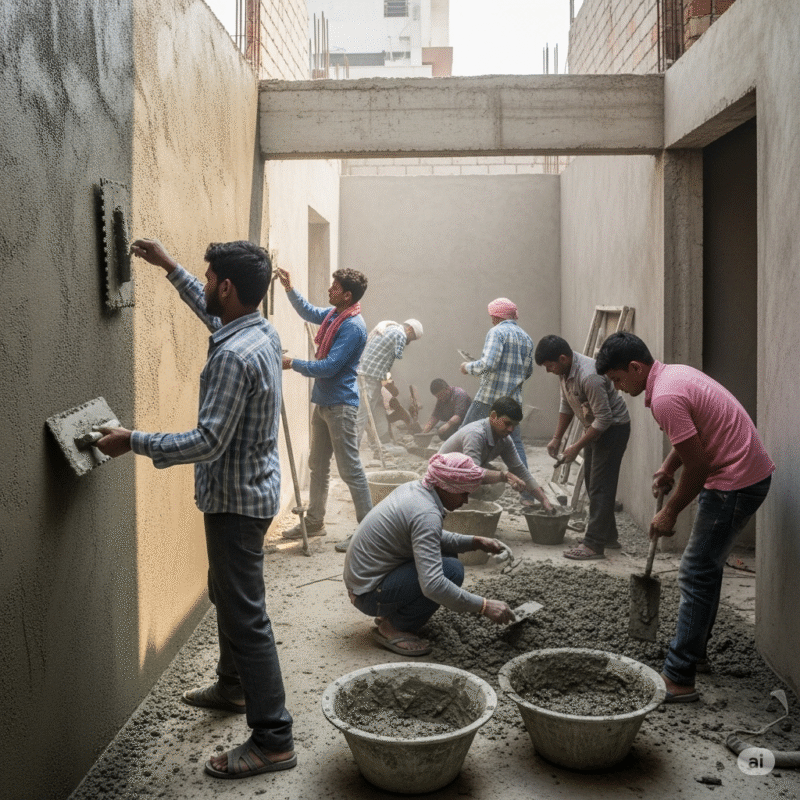
1. Plastering
What is Plastering and Why is it Important?
Plastering is the process of applying a mixture of cement, sand, and water to walls, ceilings, and other surfaces to create a smooth, durable finish. It serves multiple purposes:
- Creates a level surface for subsequent finishes
- Provides protection against moisture and weathering
- Improves the fire resistance of the structure
- Enhances acoustic properties
- Conceals structural irregularities and utility lines
Key Methodologies in Plastering
Traditional Cement Plastering
This common method involves applying layers of cement mortar to achieve the desired finish.
- Surface Preparation: Cleaning the surface, removing dust and loose materials, and ensuring proper dampening
- Application of First Coat (Scratch Coat): 8-12mm thick layer with a rough texture
- Curing: Maintaining moisture for 3-7 days
- Application of Second Coat (Float Coat): 6-8mm with semi-smooth finish
- Final Finishing: Achieving the desired texture and smoothness
Gypsum Plastering
Increasingly popular in Indian residential projects for its smooth finish and faster application.
- Surface Preparation: Cleaning and applying a POP (Plaster of Paris) primer
- Single Coat Application: 12-15mm thick layer applied and finished in one go
- Finishing: Smoothing with special trowels within the setting time
- Curing: Minimal to no water curing required
Ready-Mix Plastering
Pre-mixed formulations that only require water addition at the site.
- Mixing: Adding specified amount of water to the ready-mix
- Application: Similar to traditional plastering but with more consistent material
- Finishing and Curing: As per manufacturer specifications
Material and Manpower Requirements
| Material | Specification | Quantity (Approximate) |
|---|---|---|
| Cement | 43/53 Grade OPC | 0.25 bags per sq.m for 12mm thickness |
| Sand | Clean, sieved, free from organic matter | 0.015 cubic meters per sq.m |
| Water | Clean, potable | As required for workability |
| Admixtures | Water-reducing, waterproofing | As per manufacturer |
Manpower Requirements:
- Mason/Plasterer: 1 per 15-20 sq.m per day
- Helper: 1-2 per mason
- Supervisor: 1 per 4-5 masons
Deliverables at Different Stages
Pre-Plastering Stage:
- Approved mix design
- Surface preparation checklist
- Sample panels approval
- Material test certificates
During Plastering:
- Daily progress reports
- Quality control checks for thickness and plumb
- Curing schedule compliance
Post-Plastering:
- Crack mapping (if any)
- Finished surface inspection report
- Rectification list (if required)
Key Stakeholders and Communication Matrix
| Stakeholder | Role | Communication Focus |
|---|---|---|
| Client/Owner | Approving finishes, quality expectations | Quality standards, final appearance |
| Architect | Design specifications, aesthetic requirements | Design intent, special finishes |
| Structural Engineer | Structural compatibility | Movement joints, loading considerations |
| MEP Consultant | Coordination with services | Service penetrations, embedments |
| Main Contractor | Overall execution | Schedule, quality, resources |
| Plastering Subcontractor | Specialized execution | Technical execution, material |
| Site Supervisor | Day-to-day monitoring | Daily progress, quality control |
| Quality Control Team | Ensuring standards | Testing, approvals, rectifications |
Standards and Quality Control
Indian Standards:
Quality Control Checks:
- Plumb and alignment (±3mm deviation in 3m length)
- Surface smoothness (no undulations visible under grazing light)
- Thickness verification (minimum 12mm for internal, 15mm for external)
- Soundness test (no hollow sound when tapped)
Plastering Checklist
- Surface cleaned and free from dust/loose materials
- All MEP works completed and tested
- Proper dampening of surface before application
- Chicken mesh applied at concrete-masonry junctions
- Groove cutting at junctions of dissimilar materials
- Thickness maintained as per specifications
- Plumb and alignment checked with straight edge
- Proper curing as per schedule
- No cracks or hollow patches present
- Final surface acceptable for subsequent finishes
Value Engineering Opportunities in Plastering
Material Optimization:
- Use of fly ash or GGBS (Ground Granulated Blast-furnace Slag) as partial cement replacement
- Incorporation of polymer-modified mortars for better adhesion and reduced thickness
Process Improvements:
- Single-coat plastering systems where appropriate
- Use of spray plastering for large uniform areas
- Prefabricated wall panels with factory-applied finishes
Alternative Solutions:
- Gypsum plastering for interiors (faster, less water)
- Fiber-reinforced plasters for crack resistance
- Lightweight plasters for better thermal insulation
2. Flooring
What is Flooring and Why is it Important?
Flooring is the permanent covering of a floor structure that provides a walking surface with functional and aesthetic properties. Its importance includes:
- Creates usable, safe walking surfaces
- Contributes significantly to interior aesthetics
- Provides thermal and acoustic insulation
- Affects maintenance requirements and lifecycle costs
- Influences occupant comfort and safety
Key Methodologies in Flooring
Ceramic/Vitrified Tile Flooring
Most common in Indian residential and commercial spaces.
Process Flow:
- Base Preparation: Cleaning, leveling with PCC (Plain Cement Concrete) if required
- Bedding Mortar: Application of cement mortar bed (1:4/1:6 ratio)
- Tile Laying: Placing tiles with specified joints using spacers
- Grouting: Filling joints with cement or epoxy grout
- Cleaning and Curing: Removing excess grout and curing as needed

Natural Stone Flooring (Marble, Granite, Sandstone)
Popular for premium residential and commercial spaces.
- Base Preparation: Similar to tile flooring
- Bedding Preparation: Thicker mortar bed (25-40mm)
- Stone Laying: Careful placement ensuring level surface
- Grinding and Polishing: Multiple stages of grinding with increasingly fine abrasives
- Final Polishing and Sealing: Achieving glossy finish and applying sealants

Wooden/Laminate Flooring
Increasingly popular for residential bedrooms and premium spaces.
- Subfloor Preparation: Ensuring completely dry, level surface
- Moisture Barrier: Laying polyethylene sheet
- Underlayment: Installing cushioning material
- Flooring Installation: Laying planks with appropriate expansion gaps
- Finishing: Installing skirting/beading and final cleaning
Industrial Flooring
For factories, warehouses, and heavy-duty applications.
- Base Concrete: High-strength concrete base
- Surface Hardeners: Application of dry shake floor hardeners
- Troweling: Multiple passes to achieve densified surface
- Curing: Specified curing regime
- Joint Filling: Filling control joints with specified materials

Material and Manpower Requirements
| Flooring Type | Materials | Approximate Quantity | Specialized Tools |
|---|---|---|---|
| Ceramic/Vitrified | Tiles, cement, sand, grout | 1.05 sq.m tiles per sq.m area | Tile cutter, leveling system |
| Natural Stone | Stone slabs, adhesive/mortar | 1.05 sq.m stone per sq.m area | Stone cutter, polishing machine |
| Wooden | Planks, underlayment, adhesive | 1.05 sq.m planks per sq.m area | Saw, nailer, moisture meter |
| Industrial | Concrete, floor hardeners | 3-5 kg hardener per sq.m | Power trowel, grinding machine |
Manpower Requirements:
- Flooring Mason: 1 per 8-12 sq.m per day (tile/stone)
- Helper: 1-2 per mason
- Specialized labor for wooden/industrial flooring
- Supervisor: 1 per 3-4 masons
Deliverables at Different Stages
Pre-Flooring Stage:
- Approved flooring layout plan
- Sample approval
- Base preparation checklist
- Material test certificates
During Flooring:
- Daily progress reports
- Level and alignment checks
- Joint width verification
Post-Flooring:
- Finished surface inspection report
- Test for hollowness (for tile/stone)
- Final appearance approval
- Maintenance manual
Key Stakeholders and Communication Matrix
| Stakeholder | Role | Communication Focus |
|---|---|---|
| Client/Owner | Final approval, usage requirements | Material selection, maintenance |
| Architect | Design specifications, patterns | Aesthetic aspects, detailed patterns |
| Interior Designer | Interior theme coordination | Color scheme, transitions between spaces |
| Main Contractor | Overall coordination | Schedule, sequence with other works |
| Flooring Subcontractor | Specialized execution | Technical details, material handling |
| MEP Contractor | Service coordination | Floor traps, service outlets |
| Material Supplier | Material provision | Supply schedule, technical support |
| Facility Management | Future maintenance | Cleaning protocols, replacement strategy |
Standards and Quality Control
Indian Standards:
- IS 1237:2012 – Cement concrete flooring tiles
- IS 13630 (Parts 1-15) – Ceramic tiles – Methods of testing
- IS 4457:2007 – Ceramic unglazed vitreous acid-resistant tiles
- IS 14700:1999 – Requirements for industrial floor finishes
International Standards:
- ASTM C1028 – Standard test method for slip resistance
- EN 14411 – Ceramic tiles standards
- ISO 10545 – Test methods for ceramic tiles
Quality Control Checks:
- Levelness (±3mm deviation in 3m length)
- Joint alignment and width
- Surface finish and appearance
- Adhesion test for hollowness
- Slip resistance verification
- Water absorption test for wet areas
Flooring Design Basis Calculations
Example: Tile Flooring Material Calculation
For a room measuring 4m × 5m with 600mm × 600mm tiles:
- Floor Area = 4m × 5m = 20 sq.m
- Number of Tiles = (Area × 1.05) ÷ (Tile Area) = (20 × 1.05) ÷ (0.6 × 0.6) = 21 ÷ 0.36 = 58.33 ≈ 59 tiles
- Cement Mortar (1:4) for 25mm thickness:
- Cement = (Area × Thickness × 1.54 × 0.2) ÷ 1440 = (20 × 0.025 × 1.54 × 0.2) ÷ 1440 = 0.0107 cum ≈ 0.7 bags
- Sand = (Area × Thickness × 1.54 × 0.8) ÷ 1600 = (20 × 0.025 × 1.54 × 0.8) ÷ 1600 = 0.0385 cum
- Grout Requirement for 3mm joint width:
- Perimeter of each tile = 2 × (0.6 + 0.6) = 2.4m
- Total joint length = 2.4 × 59 × 0.5 = 70.8m
- Grout volume = 70.8 × 0.003 × 0.025 = 0.00531 cum ≈ 5.3 liters
Flooring Calculator
The value **1.54** accounts for the **dry volume of mortar**. When cement and sand are mixed, their total volume increases by about 54% due to voids. So, to ensure we get the correct **wet volume** after mixing, we multiply the calculated volume by **1.54** as a bulking factor.
Value Engineering Opportunities in Flooring
Design Optimization:
- Using larger format tiles to reduce joint lines and installation time
- Strategic material selection should be based on functional requirements, rather than uniform application.
- Zoning strategy for different flooring types based on traffic and usage
Material Alternatives:
- Engineered wood is preferred over solid hardwood.
- Porcelain tiles that mimic natural stone
- Micro-concrete flooring may be a suitable alternative to marble for specific applications.
- Vinyl flooring for quick installation and lower maintenance in appropriate areas
Technology Integration:
- Self-leveling compounds for faster base preparation
- Dry-set adhesives are preferable to traditional mortar beds.
- Click-lock systems for quicker installation of wooden/laminate flooring
- Anti-microbial additives in grout for healthcare facilities
3. Painting
What is Painting and Why is it Important?
Painting is the application of liquid pigment to surfaces to provide protection and decoration. Its importance includes:
- Protection of surfaces from environmental factors
- Enhancement of aesthetic appeal
- Creation of specific moods or ambient environments
- Extension of the lifespan of building elements
- Improvement of light reflectivity and space optimization
- Surface hygiene and maintenance simplification
Key Methodologies in Painting
Interior Emulsion Painting
Standard process for interior walls and ceilings.
Process Flow:
- Surface Preparation: Cleaning, filling cracks, sanding
- Primer Application: Applying suitable primer
- Putty Application: Building up surface evenness (typically 2-3 coats)
- Sanding: Creating smooth surface
- First Coat: First coat of emulsion paint
- Second Coat: Final coat after light sanding if required
Exterior Painting
Specialized process for facades and external surfaces.
Process Flow:
- Surface Preparation: Pressure washing, crack filling, anti-fungal treatment
- Primer Application: Exterior-grade primer
- First Coat: Weather-resistant exterior paint
- Second Coat: Final coat with proper interval as specified
- Waterproofing Integration: Often combined with waterproofing treatments

Specialized Painting
For metal, wood, and other specific surfaces.
Process Flow:
- Surface-Specific Preparation: Degreasing for metals, sanding for wood
- Specialized Primer: Anti-corrosive for metals, knotting solution for wood
- Undercoat: Building opacity and adhesion
- Top Coat: Final appearance and protection layer
- Sealing: Varnish or sealant as required
Texture and Decorative Finishes
For accent walls and special features.
Process Flow:
- Base Preparation: Priming and base coating
- Texture Application: Using specialized tools or pre-mixed textured paint
- Color Application: Tinting or multi-color application
- Protective Coating: Clear protective finish if required
Material and Manpower Requirements
| Painting Type | Materials | Coverage | Tools |
|---|---|---|---|
| Interior Emulsion | Primer, putty, emulsion paint | 5-6 sq.m/liter for 2 coats | Rollers, brushes, putty knives |
| Exterior Paint | Exterior primer, exterior emulsion | 4-5 sq.m/liter for 2 coats | Extension poles, spray equipment |
| Wood Finish | Wood primer, enamel paint/varnish | 8-10 sq.m/liter | Fine brushes, sprayers |
| Metal Paint | Anti-corrosive primer, enamel | 8-10 sq.m/liter | Special applicators, sprayers |
Manpower Requirements:
- Painter: 1 per 15-20 sq.m per day (wall painting)
- Helper: 1 per 2 painters
- Specialized painter for decorative finishes
- Supervisor: 1 per 4-5 painters
Deliverables at Different Stages
Pre-Painting Stage:
- Color scheme approval
- Surface preparation checklist
- Sample area approval
- Material approval and test certificates
During Painting:
- Daily progress reports
- Layer-wise inspection reports
- Wet film thickness checks
Post-Painting:
- Final inspection report
- Dry film thickness verification
- Color uniformity check
- Touch-up and rectification list
Key Stakeholders and Communication Matrix
| Stakeholder | Role | Communication Focus |
|---|---|---|
| Client/Owner | Color and finish approval | Aesthetic preferences, durability |
| Architect | Design specifications | Color scheme, special effects |
| Interior Designer | Interior theme coordination | Color psychology, accent features |
| Main Contractor | Overall coordination | Schedule, sequence with other works |
| Painting Subcontractor | Specialized execution | Technical application, coverage |
| Material Supplier | Paint and primer supply | Color matching, technical support |
| Facility Management | Future maintenance | Cleaning protocols, touch-up methods |
| Quality Control Team | Ensuring standards | Testing, approvals, rectifications |
Standards and Quality Control
Indian Standards:
- IS 5411 – Plastic emulsion paint
- IS 428 – Distemper and dry color
- IS 2932 – Synthetic enamel paint
- IS 15489 – Exterior emulsion paint
International Standards:
- ASTM D16 – Terminology for paint and related coatings
- ISO 12944 – Corrosion protection of steel structures by protective paint systems
Quality Control Checks:
- Surface preparation adequacy
- Wet film thickness (during application)
- Dry film thickness (after drying)
- Adhesion test (tape test method)
- Visual inspection for:
- Color uniformity
- Coverage completeness
- Absence of runs, sags, and blisters
- Surface finish as specified
Paint Coverage and Calculation
Example: Interior Wall Painting Calculation
For a room measuring 4m × 4m with a height of 3m:
- Wall Area = 2 × (4 + 4) × 3 = 48 sq.m
- Deductions for doors (1 × 2.1m × 0.9m) and windows (1 × 1.2m × 1.2m) = 1.89 + 1.44 = 3.33 sq.m
- Net Wall Area = 48 – 3.33 = 44.67 sq.m
- Primer Requirement (coverage 8 sq.m/liter) = 44.67 ÷ 8 = 5.58 liters
- Paint Requirement (coverage 5.5 sq.m/liter for 2 coats) = 44.67 ÷ 5.5 = 8.12 liters
- Putty Requirement (coverage 20 sq.m/kg for 2mm thickness) = 44.67 ÷ 20 = 2.23 kg
Paint Quantity Calculator
Painting Execution Checklist
- Surface cleaned and free from dust/loose materials
- All other finishes protected from paint splatter
- Ambient conditions within recommended range (temperature 10-35°C, RH < 70%)
- Surface moisture content verified (< 12% for plaster)
- Primer applied evenly with specified thickness
- Putty application smooth and uniform
- Adequate drying time between coats observed
- Paint mixed thoroughly before application
- No runs, sags, or uneven coverage
- Edge cutting precise and straight
- Final appearance matches approved sample
Value Engineering Opportunities in Painting
Material Selection:
- High-quality paints with better coverage to reduce number of coats
- Washable paints in high-traffic areas for extended life
- VOC-free paints for better indoor air quality and health benefits
Application Methods:
- Airless spray painting for large uniform areas (30-40% labor saving)
- Single-coat systems with high-build formulations
- Pre-primed materials to reduce on-site work
Color and Design Strategy:
- Strategic use of accent walls instead of uniform premium finishes
- Light colors to improve natural light utilization and reduce artificial lighting needs
- Anti-microbial paints for healthcare facilities
- Heat-reflective paints for external surfaces to improve energy efficiency
Case Study: Renovation of Heritage Hotel in Jaipur
Project Overview:
A 150-year-old haveli in Jaipur was being converted into a boutique heritage hotel. The project required maintaining the historic character while upgrading the facilities to modern standards.
Challenges:
- Deteriorated plaster with multiple layers of previous repairs
- Uneven stone flooring with historical significance
- Restoration of intricate painted motifs and frescoes
- Strict timeline for tourist season opening
Integrated Approach to Finishes:
Plastering Solution:
- Traditional lime plaster (1:3 lime:sand) was used instead of cement plaster
- Special additives like egg white and jaggery (traditional ingredients) were incorporated
- Staged approach: repair, consolidation, and final coat
- Result: Authentic finish with better breathability for the old structure
Flooring Approach:
- Documentation and numbering of existing stone patterns
- Careful removal, cleaning, and reinstatement
- Supplementing with matching stone from the same quarry
- Micro-leveling without disturbing the character
- Result: Preserved heritage value while improving functionality
Painting Strategy:
- Research into original pigments used
- Creation of color palette matching historical precedent
- Specialized artisans for fresco restoration
- Modern clear protective coating for longevity
- Result: Authentic appearance with modern durability
Outcome:
The project was completed two weeks ahead of schedule and resulted in:
- 15% cost saving through material optimization
- Preservation of heritage character with modern performance
- Award-winning renovation recognized for balancing authenticity and function
- Excellent user experience reflected in guest reviews
- Minimum maintenance requirements despite heavy usage
Key Learnings:
- Integration of the three finish elements (plastering, flooring, painting) must be considered holistically
- Material compatibility is crucial for long-term performance
- Traditional techniques often offer sustainable alternatives to modern methods
- Proper sequencing reduces rework and damage to completed finishes
- Value engineering should consider lifecycle costs, not just initial investment
Conclusion: Best Practices for Finishes Management
Integrated Approach
The three major finishes—plastering, flooring, and painting—should be considered as an integrated system rather than isolated activities. Their interaction affects both aesthetics and performance.
Quality Control Framework
Implementing a robust quality control framework with clear acceptance criteria at each stage prevents cascading issues. Remember that defects in earlier finishes (like plastering) will manifest in later stages (like painting).
Material Selection Principles
Select materials based on:
- Functional requirements of the space
- Environmental conditions
- Expected traffic and usage
- Maintenance capabilities
- Lifecycle cost rather than initial cost
Execution Strategy
- Proper sequencing to prevent damage to completed works
- Clear responsibility matrix for interfaces between different trades
- Adequate protection of finished work during subsequent activities
- Systematic handover between contractors
Long-term Considerations
- Maintenance manuals with specific care instructions
- Spare material provision for future repairs
- Documentation of brands, types, and batches used
- Training for maintenance staff on proper care procedures
By understanding the processes, standards, and best practices related to plastering, flooring, and painting, project stakeholders can ensure high-quality finishes that enhance both the functionality and aesthetics of their buildings while optimizing resource utilization and lifecycle costs.